Showing posts with label Gluten-free diet. Show all posts

Friday, February 28, 2014

Chicken with Bell Peppers

Weekdays are always busy. Coming home from work famished, dinner needs to be done as quickly as possible. When I say quickly, I mean less than 30 min. 20 min is even better.

This chicken is done under 30 min.


Either buy chicken on your way home from work or remember to take out the chicken from the freezer to thaw it in the morning before you leave for work. I usually take the chicken out from the freezer in the morning. Then, when I come home in the evening hungry, I can get to work immediately without waiting for the frozen chicken to thaw.


Not a fan of bell peppers? You can substitute it with broccoli or green beans. Since I am making only one thing for dinner, I like to meat and some veggies in it.


For 2-4 servings, you need:

1 lb chicken (boneless, skinless breasts or thighs cut into small 1" pieces)
2½ tablespoon minced garlic
1 tablespoon fresh ginger, grated or paste
1½ medium onion, finely diced [Small pieces will cook quickly, hence less cooking time]
1 red bell pepper, chopped
1 green bell pepper, chopped
1 tablespoon all-purpose flour [ Use gluten-free all purpose flour to make this GF ]
3 tablespoon white oil
salt

Sauce:
2 tablespoon tamari (soy sauce) [ For GF, use gluten free tamari]
1 tablespoon white vinegar
½ tablespoon cornstarch
½ tablespoon sugar
1½ teaspoon cayenne

How:

Heat a skillet with 2 tbsp oil on med-high to high heat. Higher heat reduces cooking time. However, use the heat level at which you can cook comfortably. If you have all this ready before start, use high heat. If you are prepping while cooking (as I do), use med-high heat.

Coat the chicken pieces with 1 tablespoon of flour and salt for seasoning. Add it to the heated oil and fry for 5 minutes, turning them around the pan until they are nicely browned.

While the chicken is browning, chop the onion. Remove the chicken pieces from the pan and keep aside. Add rest of the oil to the pan. Add the onion and fry till they are translucent. While the onion is cooking, get the ginger and garlic ready. Add it to the onions, season with salt, and fry for another 5 min or till the raw smell is gone.

Add the chicken back into the pan. Add the sauce and the chopped bell peppers. Stir and mix properly such that the chicken is coated with the onion and sauce. Put the lid on your pan and simmer for another 5 min till the sauce has thickened and the chicken is cooked all the way through.

Taste for seasoning. Serve hot with rice or noodles.


Enhanced by Zemanta

Sunday, February 16, 2014

Crispy Spicy Chickpeas


There is something about the teatime in the afternoon. There's got to be something with tea. And it has to be savory or spicy, something crispy and crunchy, not to heavy to fill you up but yet very satisfying.
Pakodas or fritters are quite common afternoon snack to be enjoyed with tea but they are definitely not quite the healthy option. On the other hand is crispy spicy chickpeas-

Spicy- check

Crispy- check

Satisfying- check

Healthy- Oh yes, check


This weekend, with my husband away at a conference, what better way to spend an afternoon than a good book, hot ginger flavored tea and these crispy chickpeas.


These are commonly found in any Indian grocery store. The unflavored roasted chickpeas or the spicy kind. They are very tasty but I always fear that they probably add some food color or preservatives which may not be too good for you. It takes so little effort to make equally tasty snack at home then why not? And the best part is you can control the spices (the level of heat) and make it healthier with less oil. And gluten free (my husband was super happy about this).


You need: 

2 15 ounce cans of chickpeas (I used organic ones to make sure they are gluten free, you can pick any)
2 tablespoon oil
1 teaspoon salt
1 teaspoon cumin powder
1½ teaspoon chili powder or cayenne (Use less for milder heat levels)
1½ teaspoon smoked paprika
½ teaspoon black pepper

How:

Preheat the oven to 375°F

Drain the chickpeas in a colander and wash under running cold water. Transfer on to a plate lined with paper towels and pat dry. This is important to make the spices stick to them and to make them crispy.

Transfer to a bowl. Add all the other ingredients and mix properly, such that all the chickpeas are coated with oil and spices.

Line a baking tray with parchment paper. Spread the chickpeas in a single layer.


Put it in the oven for 1 hr. After an hour take them out and cool. Check if they are crispy, otherwise put them back in for another 10 min. [For the number of times that I have done this, it has taken somewhere between 1 hr to 1 hr and 15 min.]

Cool completely and store in an airtight container. It should have a long shelf life but I would never know. It never lasts more than a week in my house, they are so good :)


Enhanced by Zemanta

Saturday, February 8, 2014

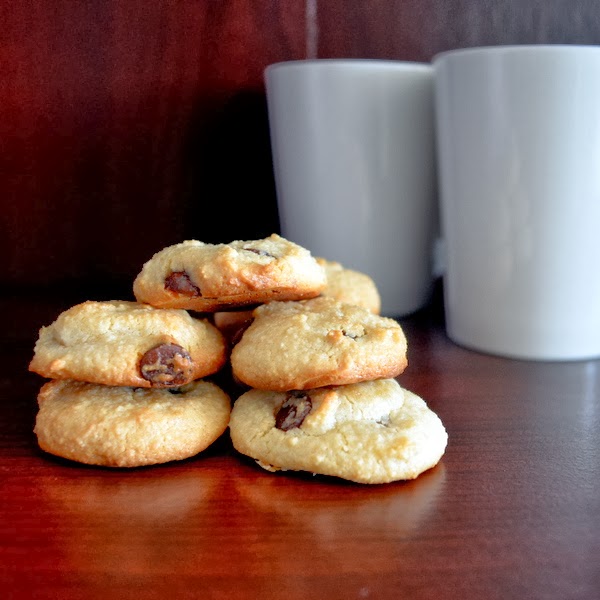
Almond Chocolate Chip Cookies


Love almonds, love chocolate, love cookies. On top of that, these are no fuss cookies. No fancy equipment required. And the best part:

These are easy to make.

These are healthy, gluten free and dairy free.

These are "melt in your mouth" delicious.


Initially these were intended to be for my husband's snacks and these are gluten-free. But honestly speaking, you will not miss the gluten here. I have no gluten intolerance but I love these just as much as any other. 

I have made this from scratch- blanched almonds myself and made a paste. However, you can easily substitute with almond meal. But you will miss the fun of removing the almond skins. Yes, I said fun. Especially if you have kids!


How to blanch almonds and have fun-

Soak almonds in hot water for 5 min. The skin will be soft and can be removed very easily.

The fun part is: If you press one end of the almond with the tip of your fingers, you can "launch" the almond. Shoot it like a rocket to the other side of your room. This is great fun if you don't mind almonds all over your kitchen :)

Now to the recipe:

You need (for 40 cookies):

2 cups blanched almonds (see above) or almond meal
½ cup almond milk (you may use full fat milk, almond milk for dairy free cookies)
½ cup maple syrup (you may use honey or agave or sugar)
¼ cup oil
⅓ cup semi-sweet chocolate chips
½ teaspoon baking powder
1 teaspoon vanilla extract
pinch of salt

How:

Preheat the oven to 350°F and line a baking sheet with parchment paper.

Grind the blanched almonds (see above-how to blanch almonds) to a smooth paste with the help of milk.

Add all ingredients in a bowl and mix well. Add the chocolate chips last.

Place about a tablespoon of the dough an inch apart from each other on the baking sheet and bake for 30 min or until the top of the cookies become slightly brown. 

The cookies will still be soft. Cool them and they'll harden.

Enjoy them anytime of the day.


Enhanced by Zemanta

Sunday, January 19, 2014

Gluten free, Dairy free, Eggless Pancakes with Strawberry Syrup

This is not by choice. My husband has recently moved to a gluten free diet. Also quit dairy and eggs. He is doing great with these restrictions. But this has challenged my cooking, specially breakfast.

I didn't have much knowledge about gluten free diet until recently. Well, in short, you can't have oats, cereal, granola, pancakes, cookies or anything for that matter unless it is specially made gluten free.


For now, we are buying gluten free cookies and cereal. We were also buying gluten free pancakes mixes. They don't taste quite like pancakes nor do they look like one. They look brownish rather than yellowish!

Now in a family of two (me and my husband), I am not making two different breakfasts, hence I started eating gluten free pancakes too. Dissatisfied by a few of the gluten free pancakes mixes available at the store, I started looking up recipes online and perfecting them over time. Here are the things I learned:

Flour: If you plan to buy all purpose flour mix, King Arthur has a nice gluten free all-purpose flour. However, if you want to make your own mix, some of the great gluten free blogs such as Gluten-free goddess, gluten free on a shoe string, gluten free girl are great places to get ideas.

Dairy free milk: Rice milk and almond milk are great options. However note that rice milk is thin (quite like skimmed milk) while almond milk is thicker (quite like full fat milk) in consistency. So, you might need to adjust recipe accordingly.


We were kind of getting tired of having maple syrup with pancakes every morning. 

The other day, my grocery store had the most beautiful looking strawberries. Also, I love strawberries! Made a very simple syrup with strawberries. Loved them on our pancakes. In fact, it was so good, I had a few spoonfuls of syrup right out of the jar. Shhh!


You need (Makes 8 pancakes):

For pancakes:

1 cup of  GF all-purpose flour (I used King Arthur's)

2 teaspoon baking powder

¼ teaspoon salt

2 tablespoon maple syrup (You can use sugar or honey- note that the sweetness will differ)

1 teaspoon vanilla extract 

¼ cup unsweetened apple sauce (I used Mott's natural apple sauce. You can definitely use sweetened and flavored apple sauce, just note to adjust sweetness)

¾ dairy free milk (I used unsweetened almond milk here. I also use rice milk at times. Use as much as needed for the mix to come to the right consistency.)

For strawberry simple syrup:

1 lb strawberries, hulled, chopped

⅓ cup granulated sugar

⅓ water

pinch of salt

Method:

For pancakes:

Add all the ingredients in a bowl except milk and mix (I don't bother to separate dry and wet ingredients). Add the milk and whisk until there are no lumps. I first added ½ cup milk, and then slowly added ¼ cup milk to reach the right consistency (not too thick, not too runny, somewhere in the middle is the right consistency.)

Put a griddle or pan on your stovetop on medium heat. Add ¼ cup of the batter for each pancake.

Cook for a few minutes until you see bubbles in the middle of the pancake, takes a minute or two. Flip the pancake and cook the other side for about 30 seconds.

Serve with fresh fruits and homemade strawberry syrup.

For syrup:

Prepare the strawberries. Add the strawberries, sugar, water and salt in a small sauce pan on medium heat. 

Simmer for 15 min or until the sugar is dissolved and the berries become soft.

Transfer to a blender and blend to a smooth syrup. Chill before serving.


Enhanced by Zemanta